Monday, October 25, 2010

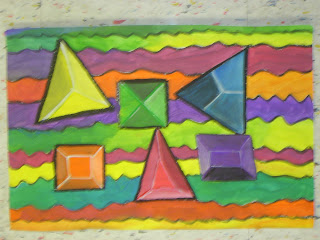
Artistic Color Mixing Sampler - Grade 3

We all started the same way, by making  3 large closed shapes that were filled in with RED, YELLOW and BLUE

To help us designate the shape without having to draw it, I showed my 2 classes that they may join 3 short wikki sticks (waxy covered wire sticks)  and twist the shape closed. 

Because we were working on a shiny cardstock, the wax stayed hooked to the page very well.  They made 3 shapes this way and painted inside each one with a different primary color. 

The next day we continued on by outlining the primary colors using 2 neutrals, a black and a white to mix a gray line around the edge of the color patches.  Then I demonstrated the color mixing to make the secondary colors of orange, green, and violet.   They could use the wikki sticks again for making the shapes.

They were able to make mixtures of any experimental colors in the available space.  The only rule that I gave them were to not mix on top of the red, yellow, blue, green, orange, or violet shapes.  They were free to create any color mixture recipes their heart's desired, just as long it was in a different spot than the already painted shapes.


Mixing palettes after 2 classes
  Most of them were delighted to get so many different mossy greens and murky browns!  Others concentrated on doing cleaner mixtures that had yellow and green, or yellow and orange and lots of different purples or reds!  Of course the key to that, was that they wiped their brush out really well between mixings.  Someone from third grade actually said, "Oh this was so much fun, we never got to mix this much before!"  That comment made me feel very happy.

Another thing that helps the color mixing step to go smoothly is to encourage color mixing to take place on the newspaper.  When they get a color they like, they can then go ahead and paint it on the project page.

Now that they are ino the final stages, they have really developed the shapes individually.  Some made the shapes into recognizable images, others focused on making the color mixed spots into a pattern, while others made only a few large mixed blobby shapes.  Each piece was quite unique.  I even saw one boy that made his shapes look like aliens!
By Macauly gr 3 "Alien Color Mixing"

The final day we got out the oil crayons again and I asked them to outline and bring out the edge of the secondary colors using black first then a touch of white.  When those three were outlined just like the primary colors I told them to switch to only colored oil crayons and put lines around and over the colored mixing spots.  They could outline them or add color on top of the spots to bring out the recipe for how the color was made. 
one example with a lot of extra mixing spots!

One student suggested that these creative color mixes look like close ups of germs.  Another student thought they looked like a view into a microscope.  Another student drew oil crayon plaid lines over the top of her color mixing spots.  It is quite a nice pattern.  I responded with a comment that went something like this, "Isn't it nice that we can see different things in each artist's work?"

Tuesday, October 19, 2010

Link to the Versatile Blogger Award

If you are looking for more information about the Versatile Blogger award, please visit my other blog, CottageGardenQuilter.

Friday, October 15, 2010

4 Different Color Mixing Lessons

The children at my school used the color wheel to mix complementary colors for the neutral backgrounds of the self portraits.  They have completed a color wheel worksheet with 12 steps of color.  Each grade is moving on with a new project that is related to this color wheel. 

In third grade we are making an artistic sampler of color mixes.  Now that they are in the final stages, they have really developed individually.  We all started the same way by making large closed shapes that were filled in with the primary color.  We went on to paint the secondary shapes.  After those 6 colors were designated, they were free to make any mixture they wanted and could make it into any shape they desired.

The fourth grade is making interactive color wheels.  The top layer will be a triangle that moves to indicate a triad of color.  It will be able to identify the primary colors as well as the secondary colors.  The bottom layer will be just a bit larger and will have the full 12 steps of color, which will include the primary, secondary, as well as the 6 tertiary colors.


Example for gr 5

Example for gr 6


The fifth and the sixth graders are designing their own color study paintings.  The 5th grade example will need a little work to bring in some of the tertiary mixes, but the layout is finished.  Fifth graders will specifically paint using the primary and secondary colors and the tertiary colors.  They may use sharpie or black oil crayon to define certain areas and shapes.   Sixth graders will do the same; however, I am encouraging them to incorporate tints, shades, and tones of the primary and secondary colors.  They will be encouraged to show color as well as form in their work.

Tuesday, October 5, 2010

Our Newest Painting on Canvas: A Patriotic Flag for Veteran's Day

Here is our latest collaborative project in which we are painting a flag image on a canvas. 

Our newest flag painting on the easel


I set up the stripes by having a long strip of cardstock cut to the correct size to get 13 equal stripes on the flag.  Students shaded along the edge of this strip with red and orange watercolor pencils. On the stripes outside edge it was shaded with blue and purple.   It was blended into the white gesso with a damp cloth.  They wiped in the direction of the stripe. 


A group working on bringing out the 50 stars from the dark BLUE background.
A different group working at bringing out the lettering on the prayer for veterans.


an older painting entitled "America's Heart"


Pictured beneath the easel is painting that was made in the year 2001.  We worked on it following the tragic events of September 11th.  We had painted the heart as a symbol for America and the doves in the lower corners were to remind of our school of the peace and healing that needed to occur for our country.  It was exhibited once at the local gallery, The PumpHouse.  We also showed the painting at a Veteran's Day Program just a couple of years ago.  This year we hope to have the new flag done by the end of Ocober.

Celebrating Saint Faustina

More Thoughts on Kristina Nelson's Crayon Art

I have been searching the archives of Kristina Nelson's Crayon Art website.  I love her work very much and would someday like to own an original.  This piece pictured here is a very special and personal piece of hers that helps show what she was feeling when she decided to convert to Catholicism.  She says that it was her personal illustration of the Chaplet of Divine Mercy that Jesus gave Faustina.

St. Faustina's feast day is celebrated today, on October 5th.

Crayon art by Kristina Nelson
Entitled:  The Mercy Prayer

Most, but not all of my students are already Catholic and I think they would see the significance of this work.  I know they would appreciate the beauty in it.  I am not Catholic myself, but I am moved by this piece of art.

Fortunately she is offering this piece as a print, so I may order a copy from her very soon.